Online Documentation for DB Comparer for SQL Server
Report designer
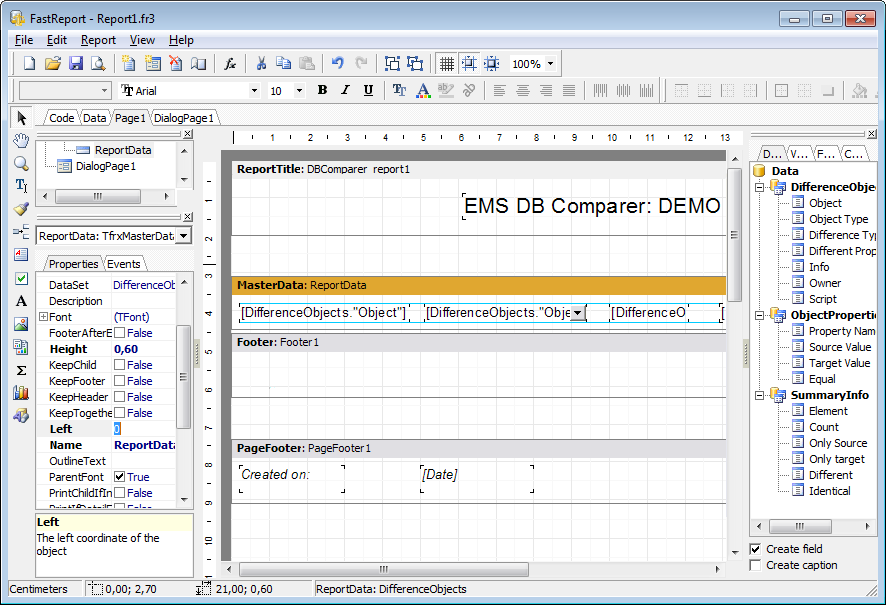
Report Designer allows you to create and edit reports. This tool is opened when you create a report in the Reports window or select any of the existing reports for editing. For your convenience there are several sample reports available.
This module is provided by FastReport (http://www.fast-report.com) and has its own help system. Press F1 key in the Report Designer to call the FastReport help.
Please find the instructions on how to create a simple report in Report Designer below:
Adding bands
- proceed to the Page1 tab of Report Designer;
-
select the
 Insert Band component on the toolbar (on the left);
- select the band to be added to the report;
- click within the working area - the corresponding element appears in the area;
- set element properties within the Properties Inspector.
Note: The Properties Inspector panel that allows you to edit report object properties can be shown/hidden by pressing the F11 key.

Adding report data
- proceed to the Data tab within the panel on the right side of the window;
-
pick an element within the
 Data tree and drag it to the working area;
- add all necessary elements one by one using drag-and-drop operation for each of them.
Viewing the report
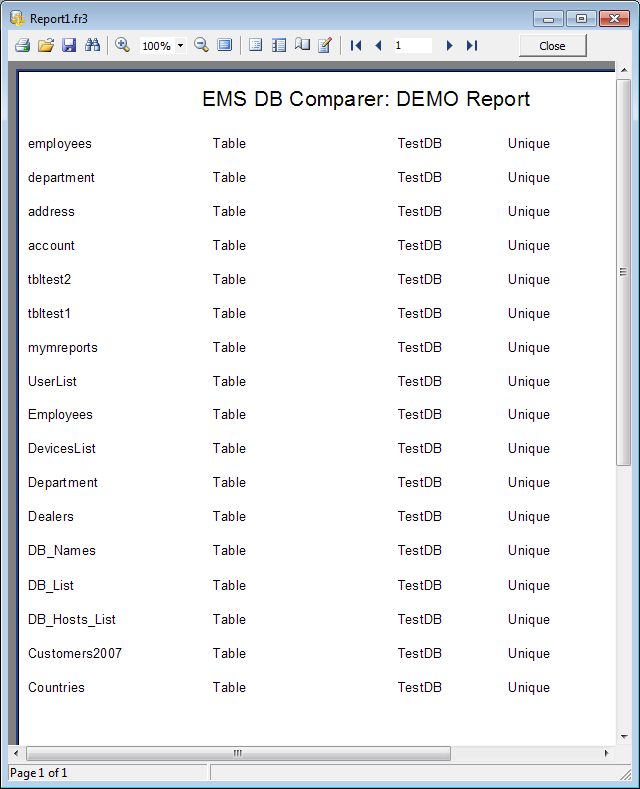
To preview the newly created report, select the Project | Preview main menu item or use the corresponding ![]() Preview toolbar button. You can also use the Ctrl+P shortcut for the same purpose. This mode allows you to view, edit and print the result report.
Preview toolbar button. You can also use the Ctrl+P shortcut for the same purpose. This mode allows you to view, edit and print the result report.
To print the report, use the ![]() Print toolbar button or the corresponding context menu item.
Print toolbar button or the corresponding context menu item.
Saving the report
When all report parameters are set, you can save the report to an external *.fr3 file on your local machine or in a machine in the LAN.
To save the report, select the Project | Save main menu item or use the corresponding ![]() Save Report toolbar button. You can also use the Ctrl+S shortcut for the same purpose.
Save Report toolbar button. You can also use the Ctrl+S shortcut for the same purpose.

